Tuesday, September 29, 2009

REPEAT, REPEAT


In the last month, I have built the second ama, going through the same steps that I did for the first hull. Today, the deck was screwed and epoxied in place. In the coming days, I shall fill the screw holes, round the edges then apply epoxy and cloth over the deck and deck/hull chines.
I am recording my steps here in case some other builder is following and can learn from my mistakes.
Some days it feels like I am writing this for my own benefit only. Anyone else reading this blog?

Saturday, August 29, 2009


Today was a small but significant step in the building of the boat. Today I took the first hull from the building frame and moved it to a car port for final coating of epoxy and sanding.
Which means that quite a bit of work has been done on that hull since the last post.
After the screw holes were filled and seams rounded off, I was able to cover the sides and bottoms with fiberglass cloth then coat it all in epoxy.
The hull was then turned over so I could work on the interior. The extra blocks of wood were bolted to the tops of a couple frames to give a solid place to bolt the cross-beams. The frames were then cut level with the top of the decking. Strips of wood were attached to the tops of frames to attach the decking. I epoxied an extra piece of plywood to the side of one section to give a strong attachment place for the chain plate for the mast shroud. The hull was cleaned out and given three coats of paint.
I cut strips of plywood for the decking. They were painted on the underside too and location of the bolting blocks was photographed. The decking was epoxied and screwed into place.
Finally, the corners were rounded and the screw holes filled in the deck. Fiberglass cloth was draped over and epoxied into place.

Thursday, August 6, 2009

Planking


I have had a few long days in the wood shop. I have accomplished a few things.
I do not want to rush this project, but it gives me a great deal of pleasure to make progress. The hours seem to slip by and I emerge late in the afternoon covered in sweaty sawdust, but feeling satisfied and at peace.
After the chines and the support pieces at the stern were glued in place, I clamped long planks of quarter-inch plywood on the sides and traced the outlines of their new shapes. I was nervous to see how they would all come together, so I had some long days getting to the closed-in stage.
Yesterday I screwed the last of the planks in place. John Marples says to use dry wall screws to hold the planks in place until the epoxy has set, then remove the screws. Instead, I used stainless screws, counter-sunk and filled the holes with epoxy filler. I am never sure how well the planks are secured. Extra work, weight and expense to leave the little screws in, but the security is worth it to me.
The attached pictures show the hull with the epoxy filler over the screw holes and filling the gaps between some of the planks.

Tuesday, July 28, 2009

More Progress


In the past week, I have been able to mark and cut out the ama frames. They came out very nicely and with great information for mounting them on the ladder frame. One small glitch that the designer, John Marples was quick to correct when I emailed him for help. Next was to cut long strips of fir to make the lateral chines for the plywood sides to attach to. The attached picture shows the bulkheads attached to the building frame and the first two chines epoxied in place. When the boat is upright, those chines will be the edges joining the sides with the deck. The plans have full-sized drawings of the shaped strips of plywood making up the tapering stern. When studying the plans, I was unable to figure out how they all went together, but once the pieces were in my hands, they were easy to figure out.
Putting those pieces together and adding the next chines will be today's fun.

Tuesday, July 14, 2009

First Assembly


Always seems to take me awhile to get into a new project. I delayed and worried about my first use of the epoxy and fiberglass cloth. One of the reasons was the failure of a couple of very small batches of epoxy. I think now that the proportions were wrong. I dreaded finding out that the epoxy stayed runny on a whole section of fiberglass! How would I fix that?
The store which sold me the fiberglass supplies advised buying a rotary cutter for the cloth, saying the edges would not fray near as bad as using scissors. Expensive, but I bought the cutter and mat.
A discussion on Duckworks led me to worry about the fiberglass cloth adhering to the sharp corners of the hulls. I know the cloth will appear at first to lie nice and flat, but before the epoxy can set up, the stiffness of the cloth lifts it away from the wood on either side of the joint, causing bubbles to form underneath. I guessed that I would need some kind of gentle pressure to hold the cloth in place until the epoxy cured. I decided to cover the affected areas with 6mil poly then place miniature sandbags on top.
In the attatched picture, I have joined, end to end, two sheets of quarter-inch plywwod. The ends are joined with epoxy-embedded 6oz fiberglass cloth. The joint was covered in poly and little sandbags just to see how they would work. I am relieved to see the epoxy set up rock-hard and where the poly covered the epoxy, the joint is glassy smooth.

Monday, July 6, 2009

Monday, July 5, 2009


Yesterday I was able to spend a couple of hours in the boat shop. I have been caring for my friend, Diana, whom you may have met in the other blogs. I have been redoing the bathroom too. Yesterday I took the afternoon off!
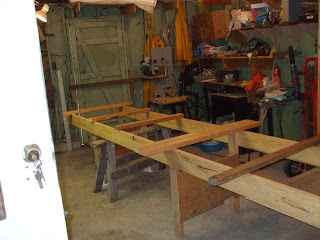
I built the strong back for the new project. I used two pieces of 2x6, 16' long and have them about 30" from the floor.
Next thing was to make a platform upon which to glue together two sheets of marine plywood. The platform is nice and flat, but the sheets have some warping. Nothing to worry about when building the boat, but a nuisance when gluing the panels together. Last thing I had time for was to grind a space for the fiberglass cloth to live. Next thing is to bond a 6" piece of fiberglass bridging those two sheets of plywood.

Thursday, May 28, 2009

Though work on the Seaclipper itself has not yet begun, I have been busy getting ready for it. I bought a Hobie 14 from which I will take the sail and mast. That boat came with a trailer that may be good enough to haul the new boat. I have been practising raising and lowering the mast. I know I am not going to get much stronger and I want to use this boat for years, so I need a secure way to raise and lower that 22' mast. So far, I have found there is a spur on the bottom aft of the boom that fits into a notch on the mast step. As long as that union is secure, the mast pivots there and can be rotated to vertical. I rigged up a jib halyard and use that block and line to secure a set of bracing lines to the outside corners of the front frame of the trampoline, which is in line with the mast step. With those lines tight, the mast has lateral support too. Last thing was to rig a block and tackle between the fore-stay and the post on the front of the trailer. Standing on the trampoline, I can help the mast a bit, and pulling on the tail of the tackle, raise the mast to vertical without any trauma. Once the fore-stay is secured to the bridle, I release the jib halyard and take off the lateral support lines. Lowering the mast is the reverse process. Seems like a lot of lines, but I would rather do that than worry and grunt it up.
I have decided to build this boat under a bit more cover than the last projects. My carports are separated by two store rooms which have been turned into workshops. Last week, I cleaned out a trailer load of old parts and left-overs. Then I tore down the wall separating the two shops. I now have one area big enough to build the main hull and the front door is wide enough to get it out. No insulation nor heat yet, but I do have four walls!

Tuesday, April 28, 2009

Opening the door

I have always loved the idea of multihulls. But I am not a sailor who loves to be on the edge, flying one hull of a catamaran. Five years ago, I bought the plans for John Marples Seaclipper 16 but instead of building it then, I followed the wisdom of the mono-hulls and built the Walkabout, rebuilt the National E and the Alacrity 19. All good boats, but I always looked over their shoulder as I danced with them, thinking of a sleek trimaran.
I want a boat that is first of all, trailerable. Then I want it to be safe. After that, I want it to feel like a motorcycle swooping through the turns. I want to sheet in the sails and 'go for it', not at all worried that I am going to flip the boat in the middle of the freezing ocean.
After dealing on a few sailing dinghies early this spring (Wayfarer, Lightning, Davidson 17) I 'woke up' and realized these were not boats that I really wanted to sail. It was then I brought out the Seaclipper plans from under the bed and again examined the details. I also found youtube has a number of videos of small sailing trimarans, Windrider 17, which helped me follow the dream. This time, the stars were aligned!
So, I have begun. Seizing the opportunity of 'low' petroleum prices, I bought five gallons of epoxy. Gasp at the prices!
I found a Hobie 14 with a new main sail, perfect for the project! It is on a home-built trailer, which will also serve very well for the new boat!
I have a number of house/yard projects lined up in front of this one, and I have a summer of playing with my other boats too. Including the Hobie before I pirate its parts.
The next entries may be a few weeks from appearing.